.png)
PortalTalk has its own Power BI connector. This article explains and show what you can do with this connector.
The PortalTalk Power BI connector opens the PortalTalk report data to the Power BI reporting and dashboard environment. You’re in control to build your own PortalTalk dashboards, or combine the PortalTalk data with data from other applications. So, you can build your own enterprise reporting environment.
What is needed
We deliver you 2 components to build Power BI dashboards with PortalTalk report data.
-
The PortalTalk Power BI connector
-
An example dashboard to showcase the capabilities of PortalTalk Power BI
Both components will be delivered as files, which you can download at the ‘Downloads for PortalTalk' section. You will find this link in the left menu.
For your convenience we provide 2 links to directly download the files to your computer.
Before you start
Please also check these 2 requirements before you get started
-
Install on your Windows computer, Power BI Desktop. It is free and can be obtained in the Microsoft Store.

-
To get access to the PortalTalk report data by Power BI, you need to have a PortalTalk Admin account permission. Easy to check, you should be able to have access to the PortalTalk Admin Center and be able to use the reports in it.
How to start
This step-by-step guide is intended for new or infrequent Power BI Desktop users who need to setup the connection in Power BI with PortalTalk.
Step 1: Install the Connector File
-
Open File Explorer on your computer.
-
Navigate to: C:\Users\<YourUsername>\Documents\Power BI Desktop\Custom Connectors
-
If you don’t see this folder, create it.
-
Copy your PortalTalk.mez file into this folder.
Step 2: Enable Custom Connectors in Power BI Desktop
-
Install Power BI Desktop from the Microsoft Store, if you did not already installed it.
-
Launch Power BI Desktop.
-
Go to File > Options and settings > Options.
-
In the left menu, choose Security.
-
Scroll to ‘Data Extensions’, and select:
“(Not recommended) Allow any extension to load without validation” -
Click OK.
-
Close Power BI Desktop to activate the connector.
Step 3. Open Your Power BI Report
-
Open File Explorer.
-
Double click the PortalTalk.pbit file. It will be opened in Power BI Desktop.
Step 4. Accessing Data Source Settings
-
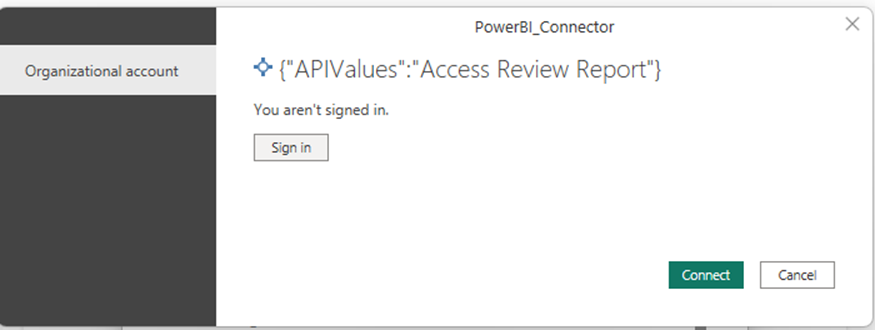
The portaltalk.pbit file is opened in Power BI Desktop and a message indicates that you aren’t signed in yet,
-
Click Sign in
-
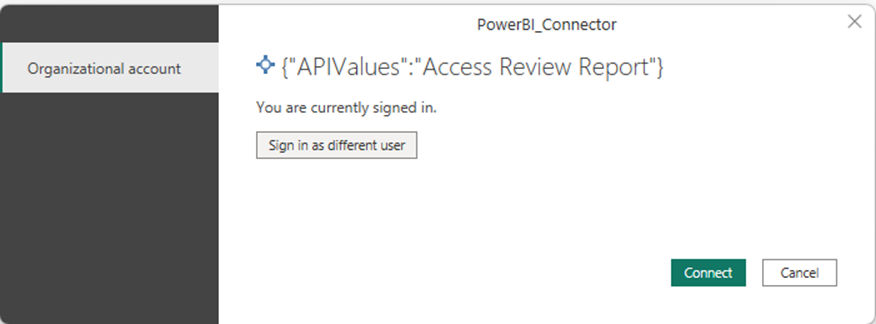
Select an account that has ‘PortalTalk Admin’ permission and log in.
-
Click Connect
-
Repeat the above steps 1. to 4. for the other queries as well:
-
{“APIValues”:”Workspaces Report”}
-
{“APIValues”:”External Users Report”}
-
{“APIValues”:”Active\/Inactive Users”}
-
{“APIValues”:”Access Permissions Report”}
-
-
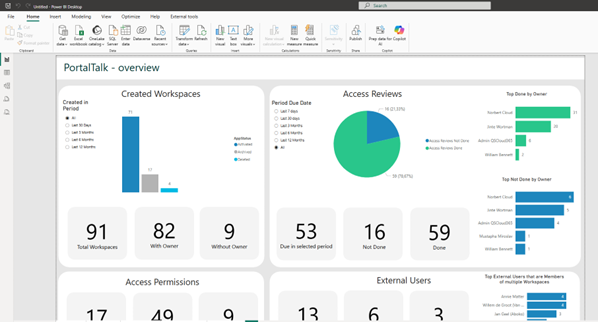
When you are finished the Example PortalTalk report will be loaded with data:
-
Click in the top menu ‘File’, save your report as pbix file.
-
Refresh the report if required to see updated information
-
You can start to share the dashboard now to present it in your organization.
Troubleshooting Tips
-
Connector not found? Ensure the PortalTalk.mez file is in the correct folder and that you’ve restarted Power BI.
-
Authentication issues? Double-check credentials or permissions, and consult your administrator if needed. Make sure you use an account that has PortalTalk Admin permissions.
Build your Own
We just told you how to use the PortalTalk connector in Power BI and how to open the standard example Dashboard. You can do better. Use your Power BI skills to build a beautiful PortalTalk dashboards. We are looking forward to see you results.