.png)
Install/Update and configure the PortalTalk integration web parts in SharePoint
PortalTalk offers two integration web parts that allow information from PortalTalk to be displayed within SharePoint.
-
The PortalTalk Team Members web part displays, within a SharePoint site, the users that have been added to this site's by the PortalTalk app.
-
The PortalTalk Sites web part displays the workspaces from the various PortalTalk categories as boards or tiles. Only the workspaces to which the current user has access permissions are displayed. This web part is often placed on the My Workplace page.
This page describes how to install and configure these web parts within the SharePoint Admin center
How often should I install or update the PortalTalk Web Parts?
In most cases, we can bring new features of the Web Parts to you without updating the web parts. In some cases, we have to ask you to update them by this procedure. We will always notify you in the release notification e-mail if this is needed for the new release. If you need to update, you can also use the procedure listed here.
Install or Update the PortalTalk integration web parts
-
Your account should hold the SharePoint Administrator permission to perform this action.
-
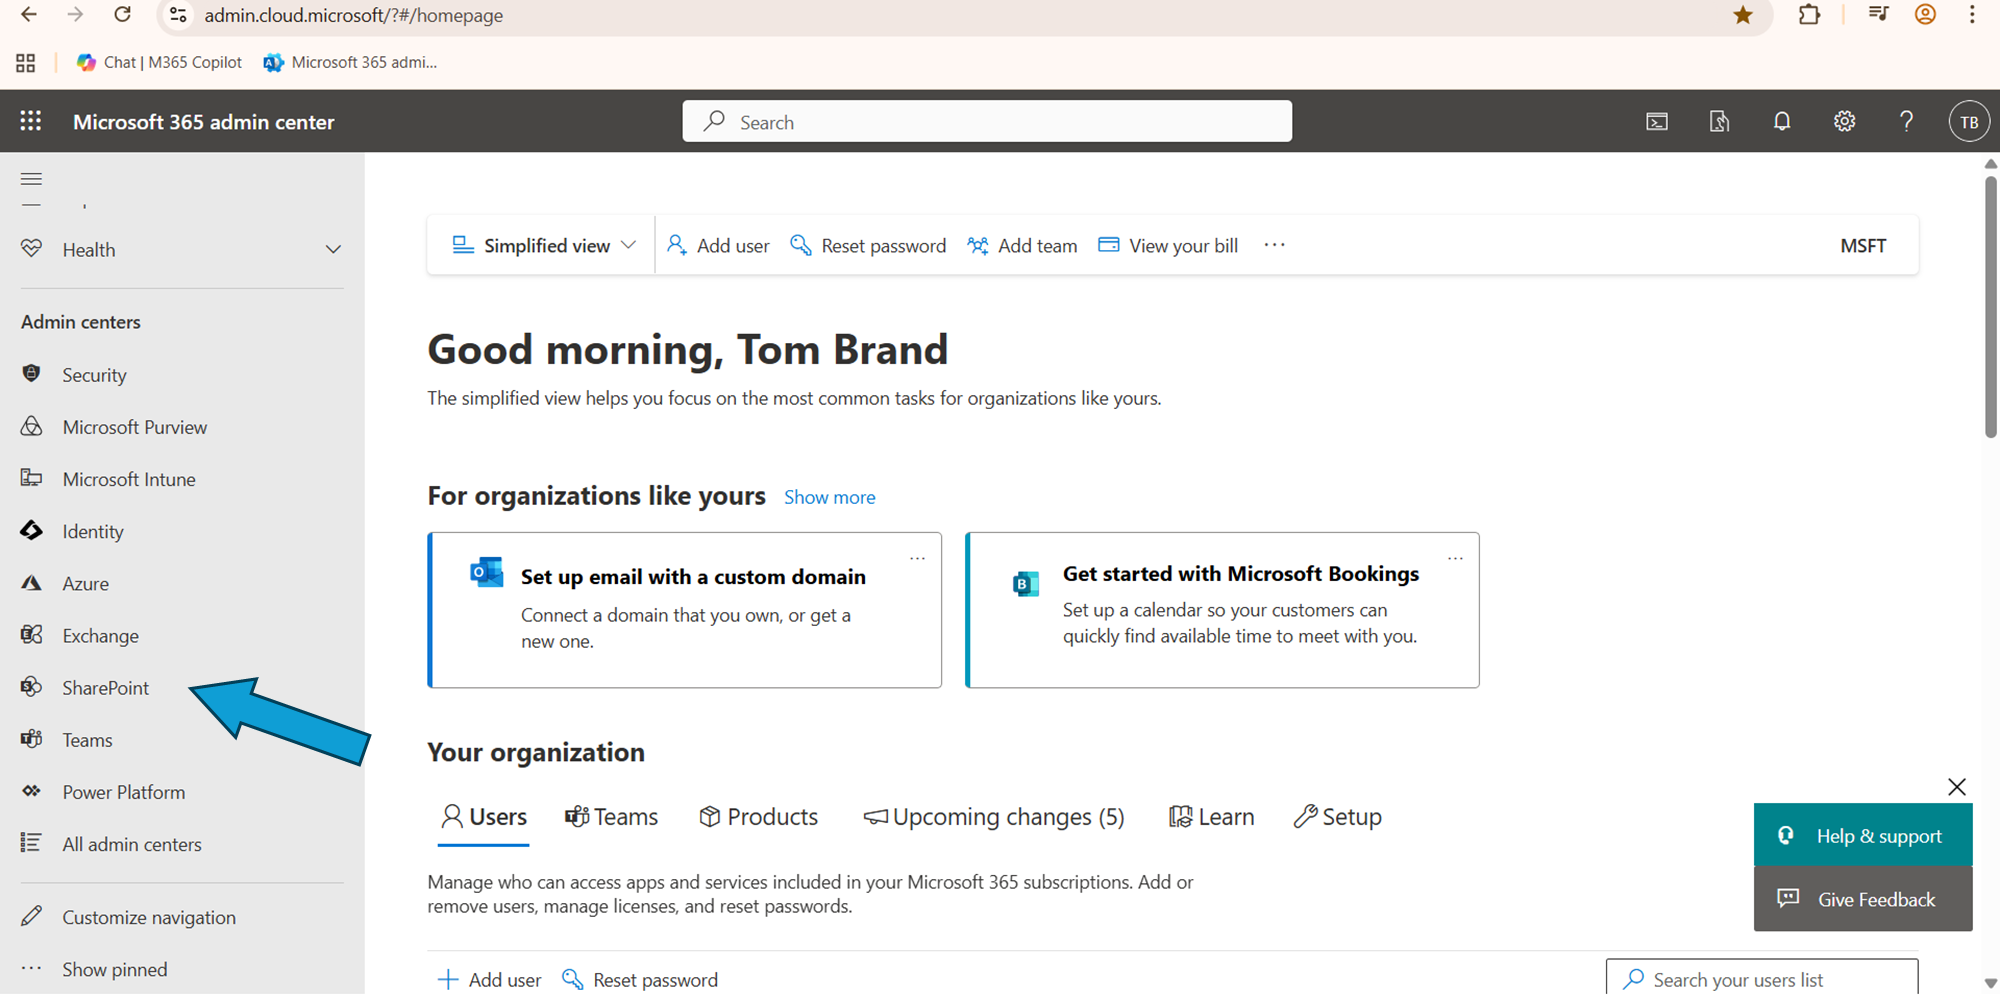
Navigate to you SharePoint Admin Center by the Microsoft 365 Admin Center
-
In the SharePoint Admin Center navigate to the ‘More Features’ at the left navigation
-
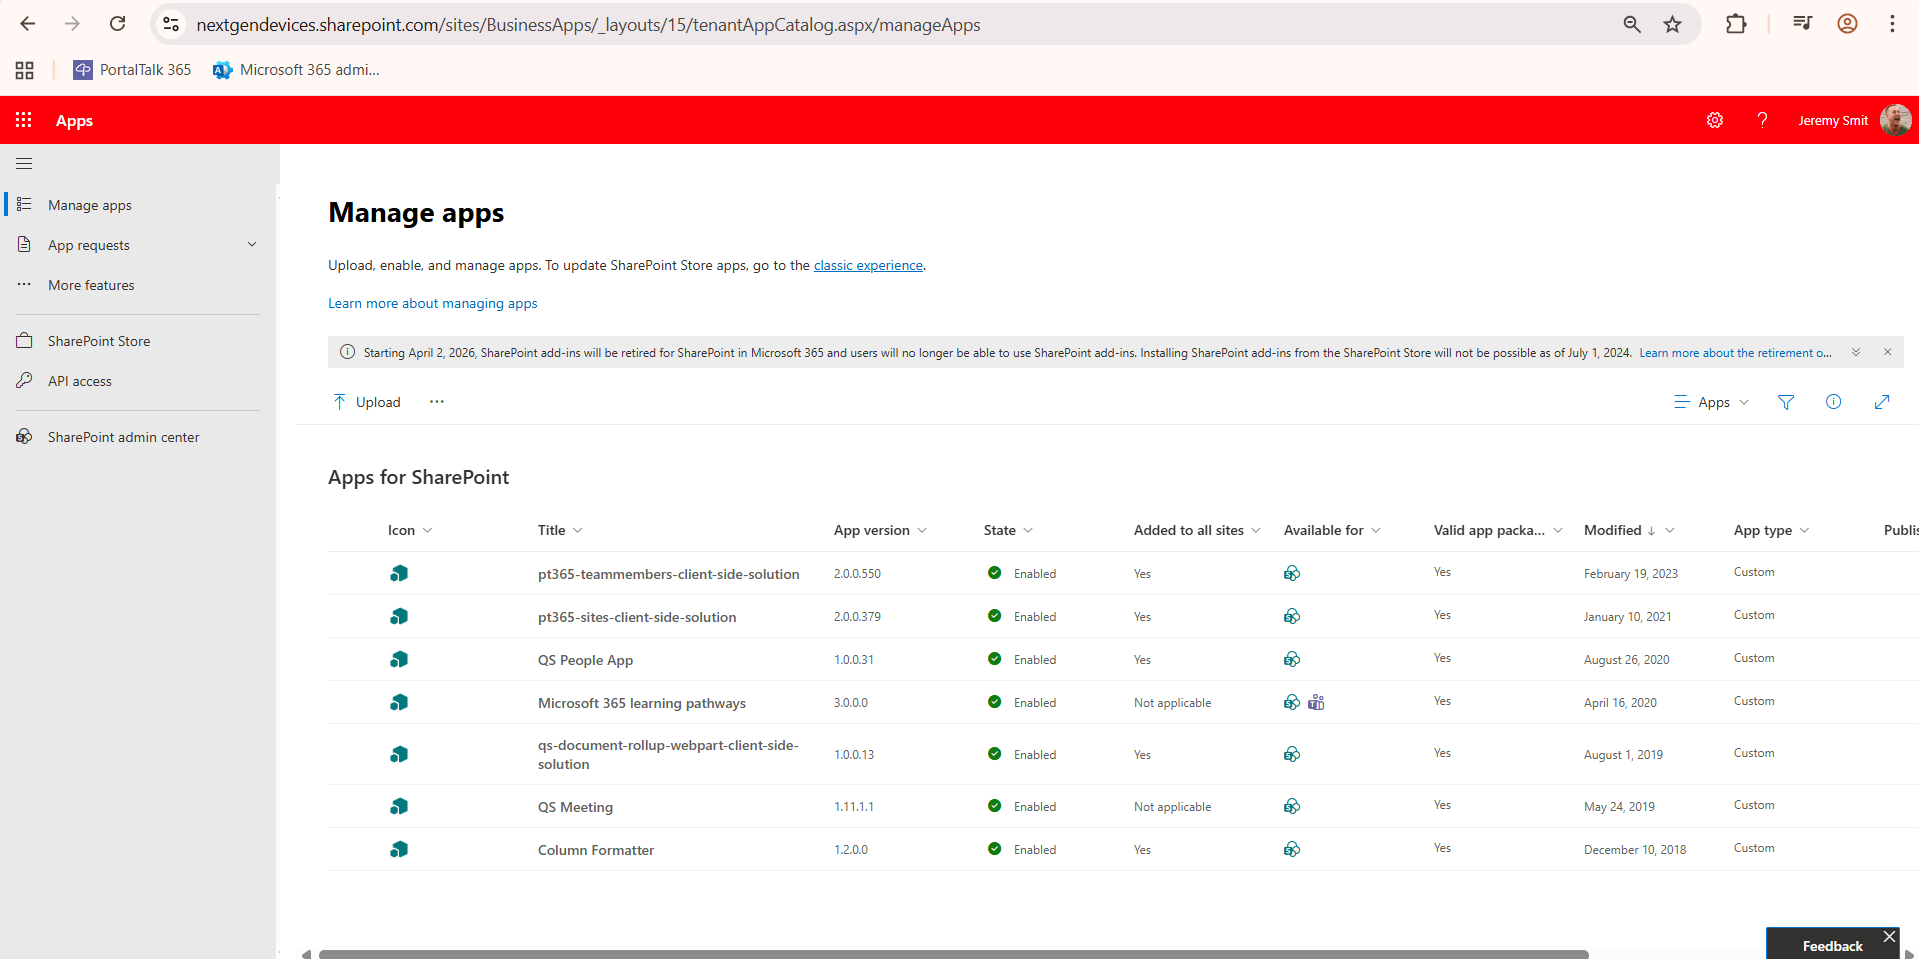
In the ‘More features' choose ‘Apps’, OPEN button
-
This screen will open.
-
Get the web parts latest version. Installation packages are available at the download center: Downloads for PortalTalk
-
Please check the PortalTalk Sites Web Part- (version) and PortalTalk TeamMembers Web Part - (version) files latest version.
-
You can check you current PortalTalk version against the new version at download center.
-
If version number is higher, you should update the web part(s).
-
-
Unzip the downloaded files. Every zip file will deliver one package file (.sppkg file)
-
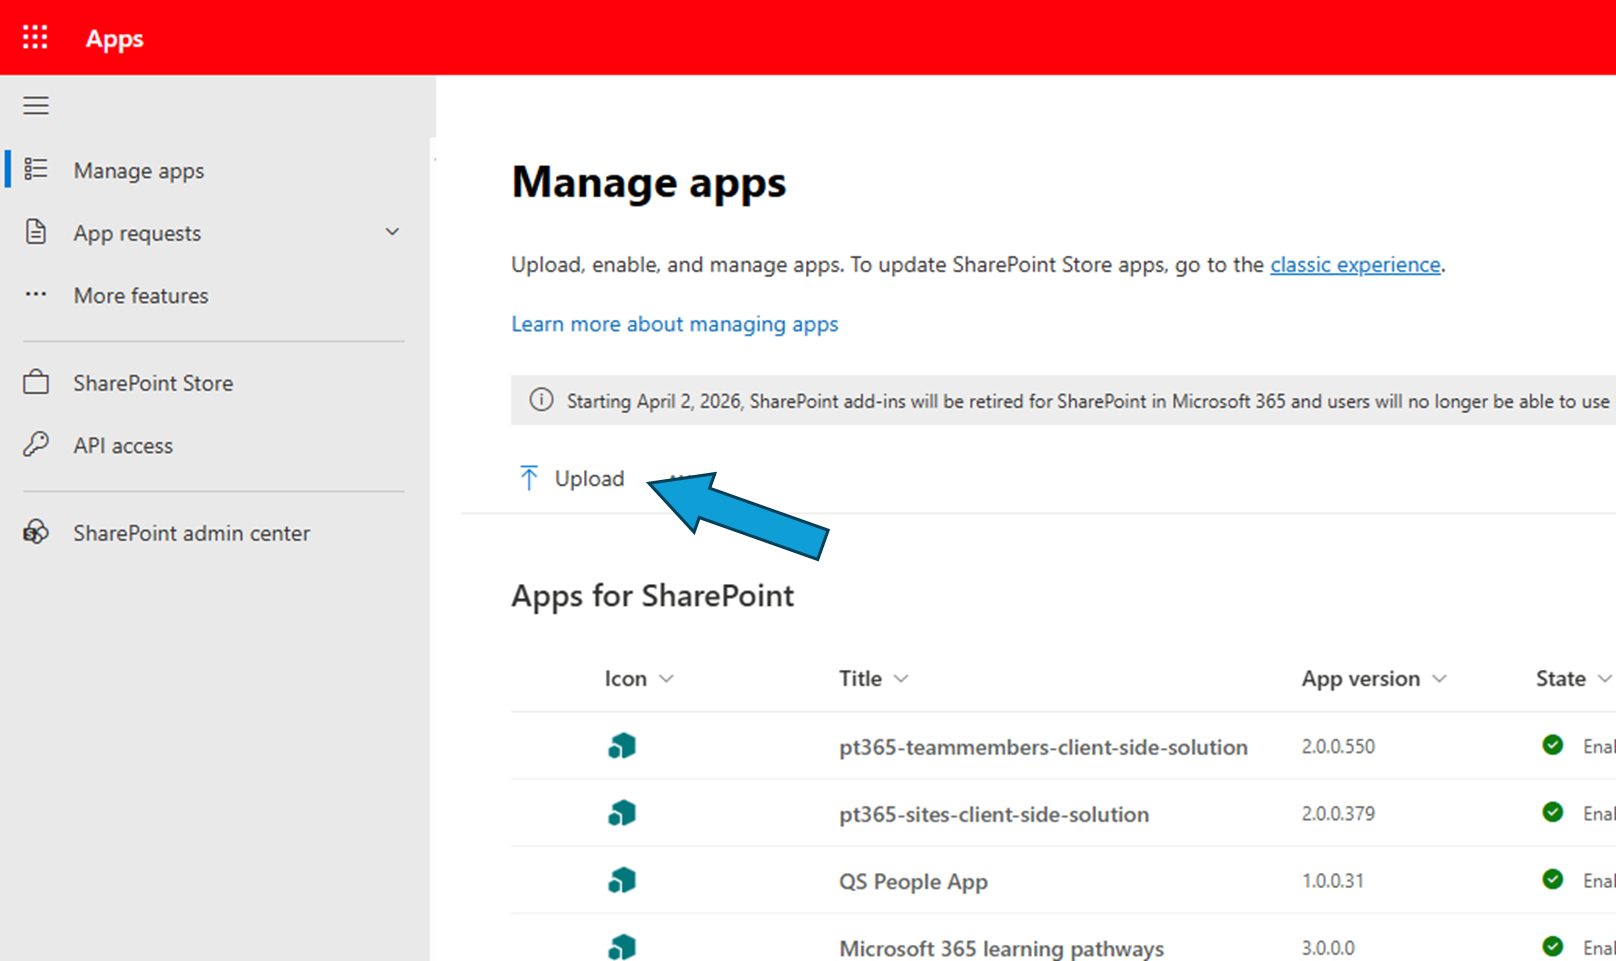
Click the ‘Upload’ button to upload the two downloaded web part files
-
In the Upload completed message bar, click Refresh.
-
If you already have a previous version of the web parts installed, follow these steps:
-
A confirmation prompt appears asking if you want to overwrite the current files.
-
Click Confirm to proceed. The old web parts are overwritten and the new version becomes active.
-
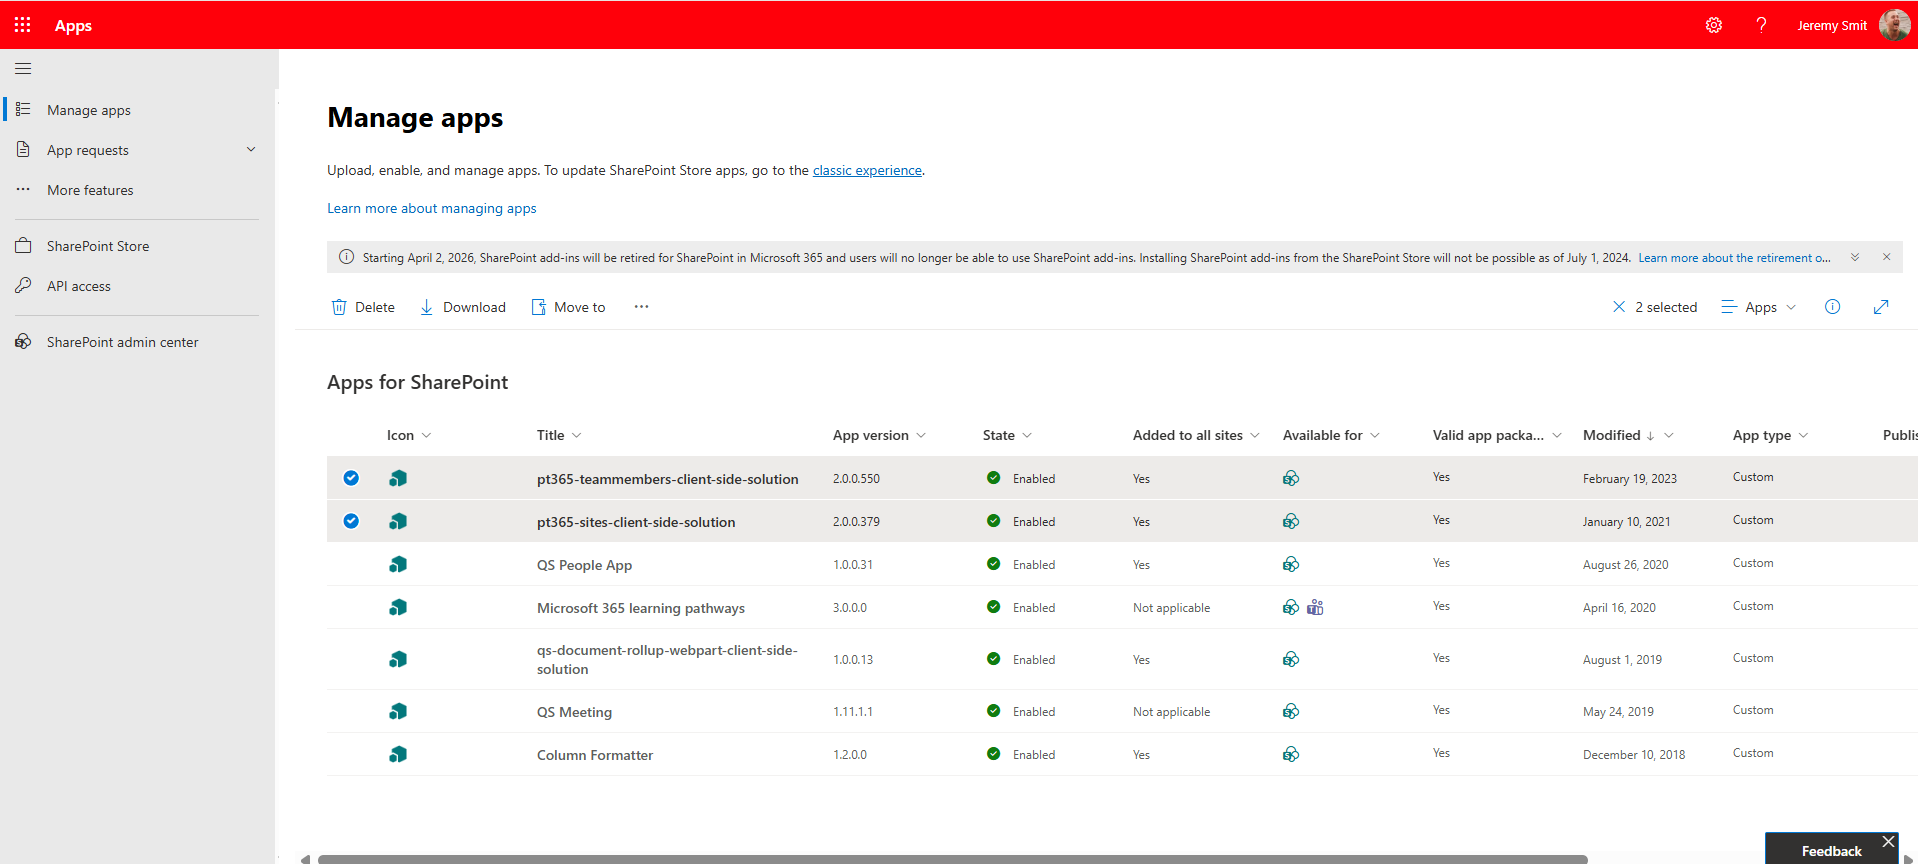
-
Now they are uploaden or updated, you should Enable them. Select the new or updated uploaded web part and choose ‘Enable'
-
If you update web part(s) the Enable screen will show automatically
-
-
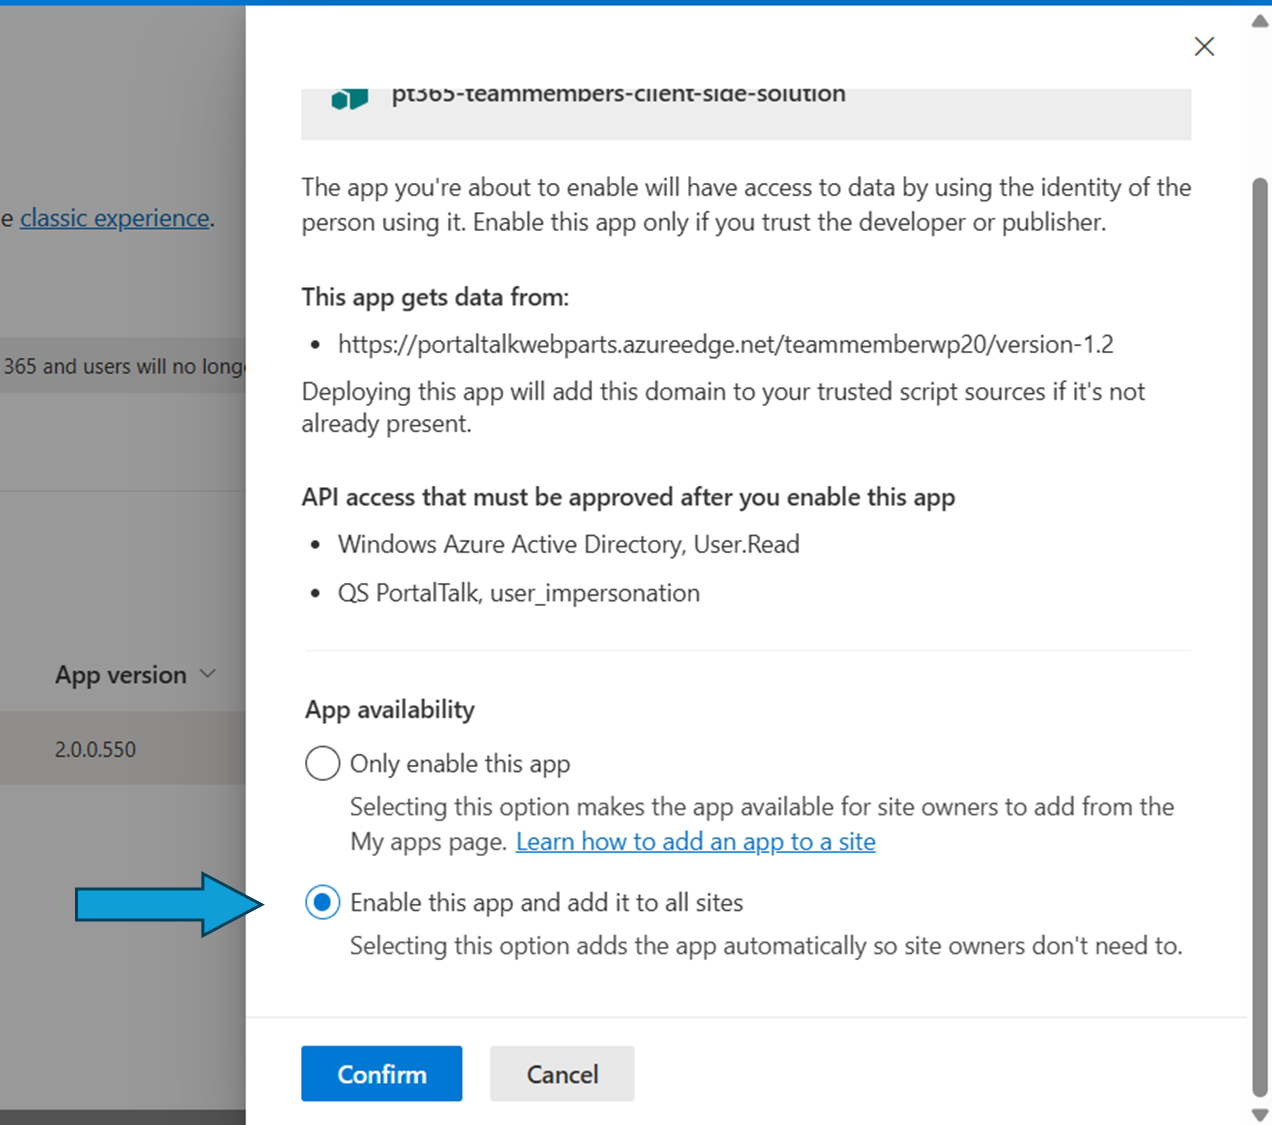
In the selection screen, choose ‘Enable this app and add it to all sites’ and press ‘Confirm’.
-
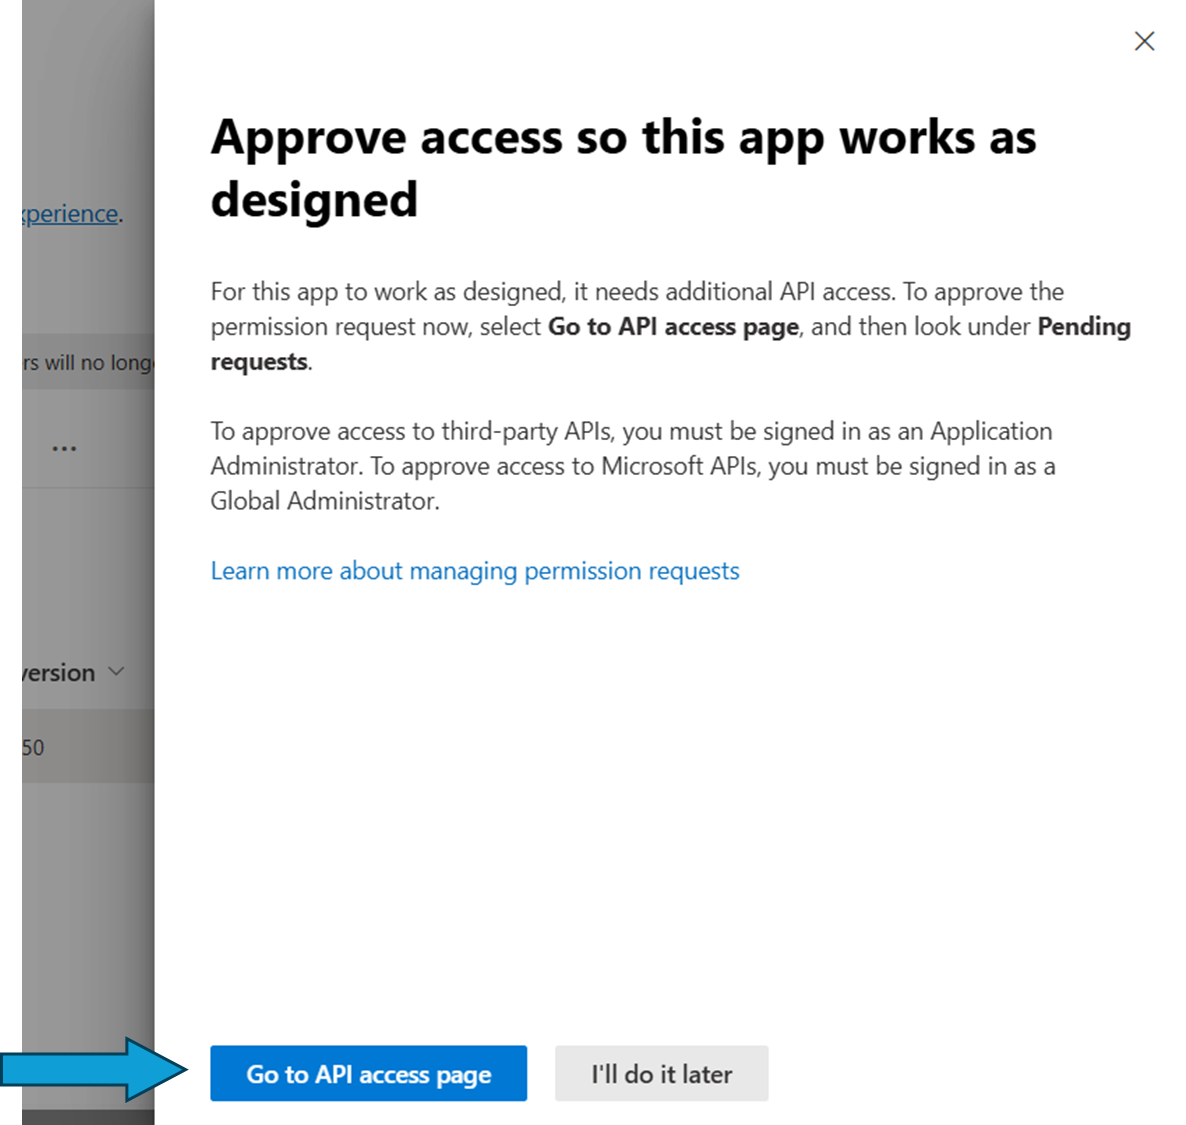
It will be acknowledged by this message.
-
Please select ‘To API access page’
-
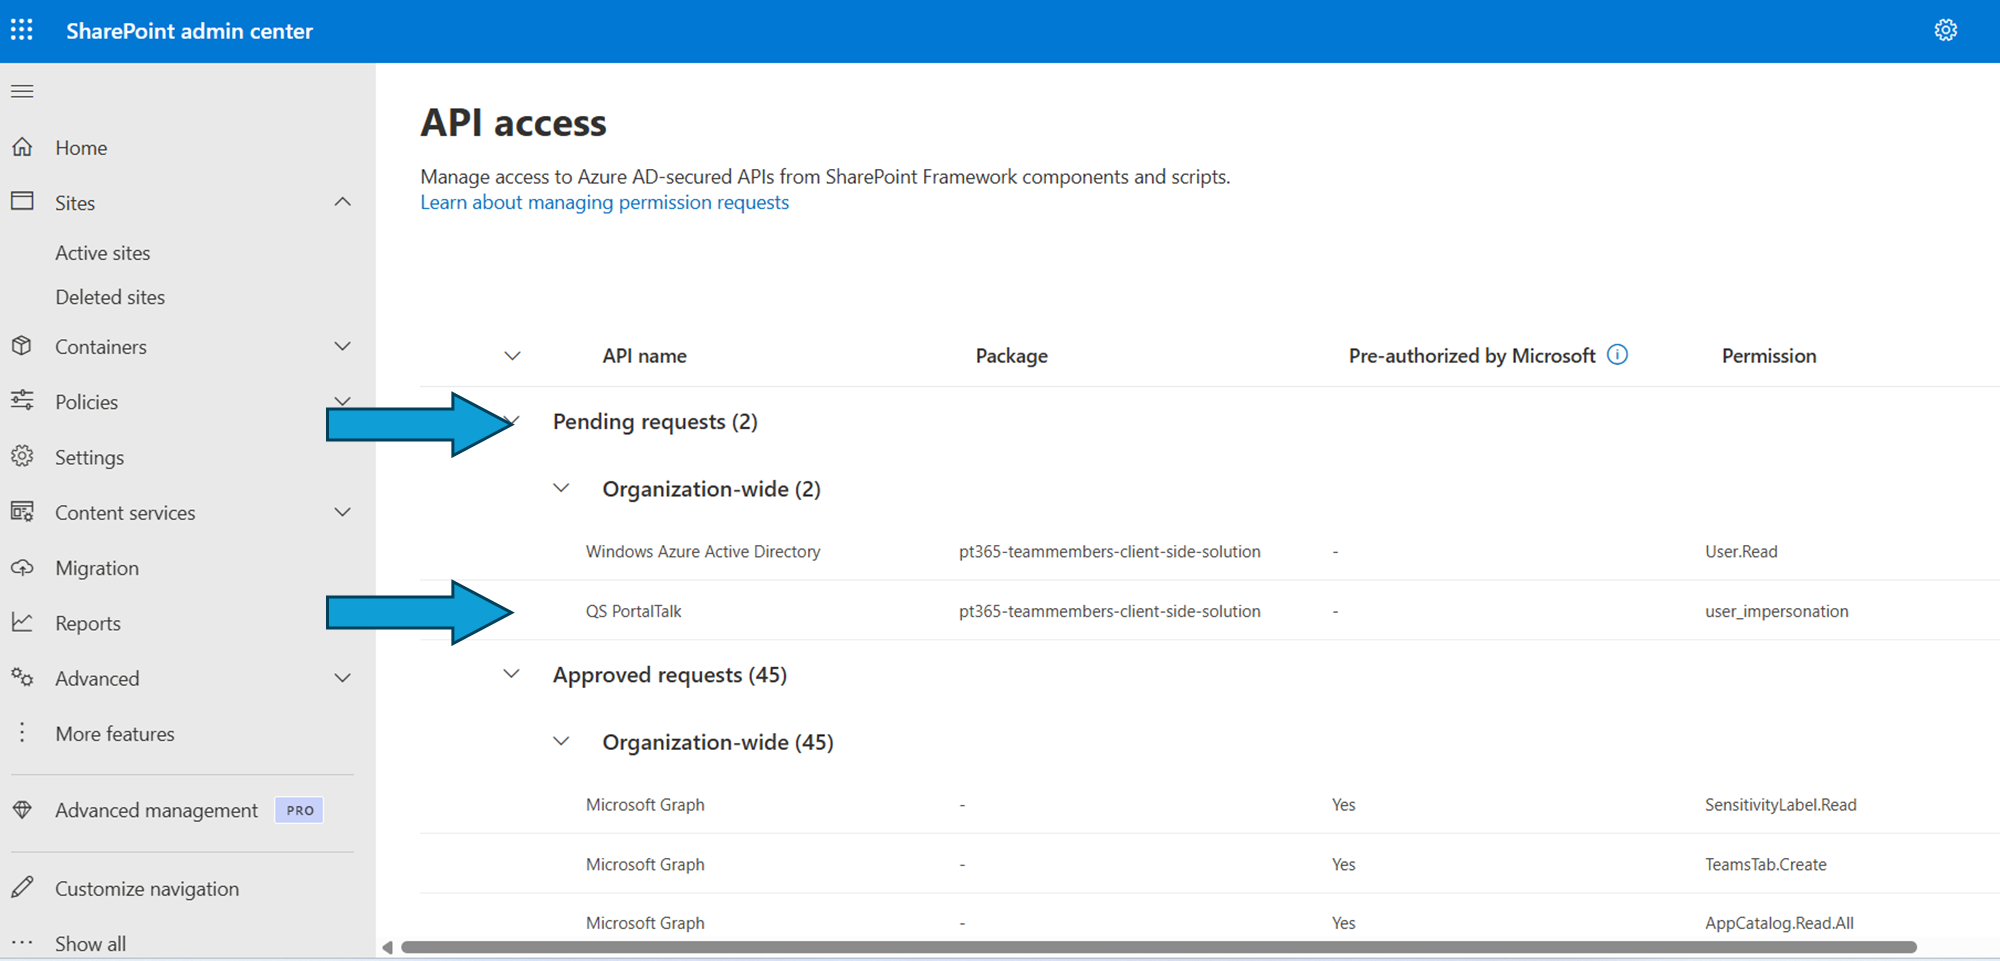
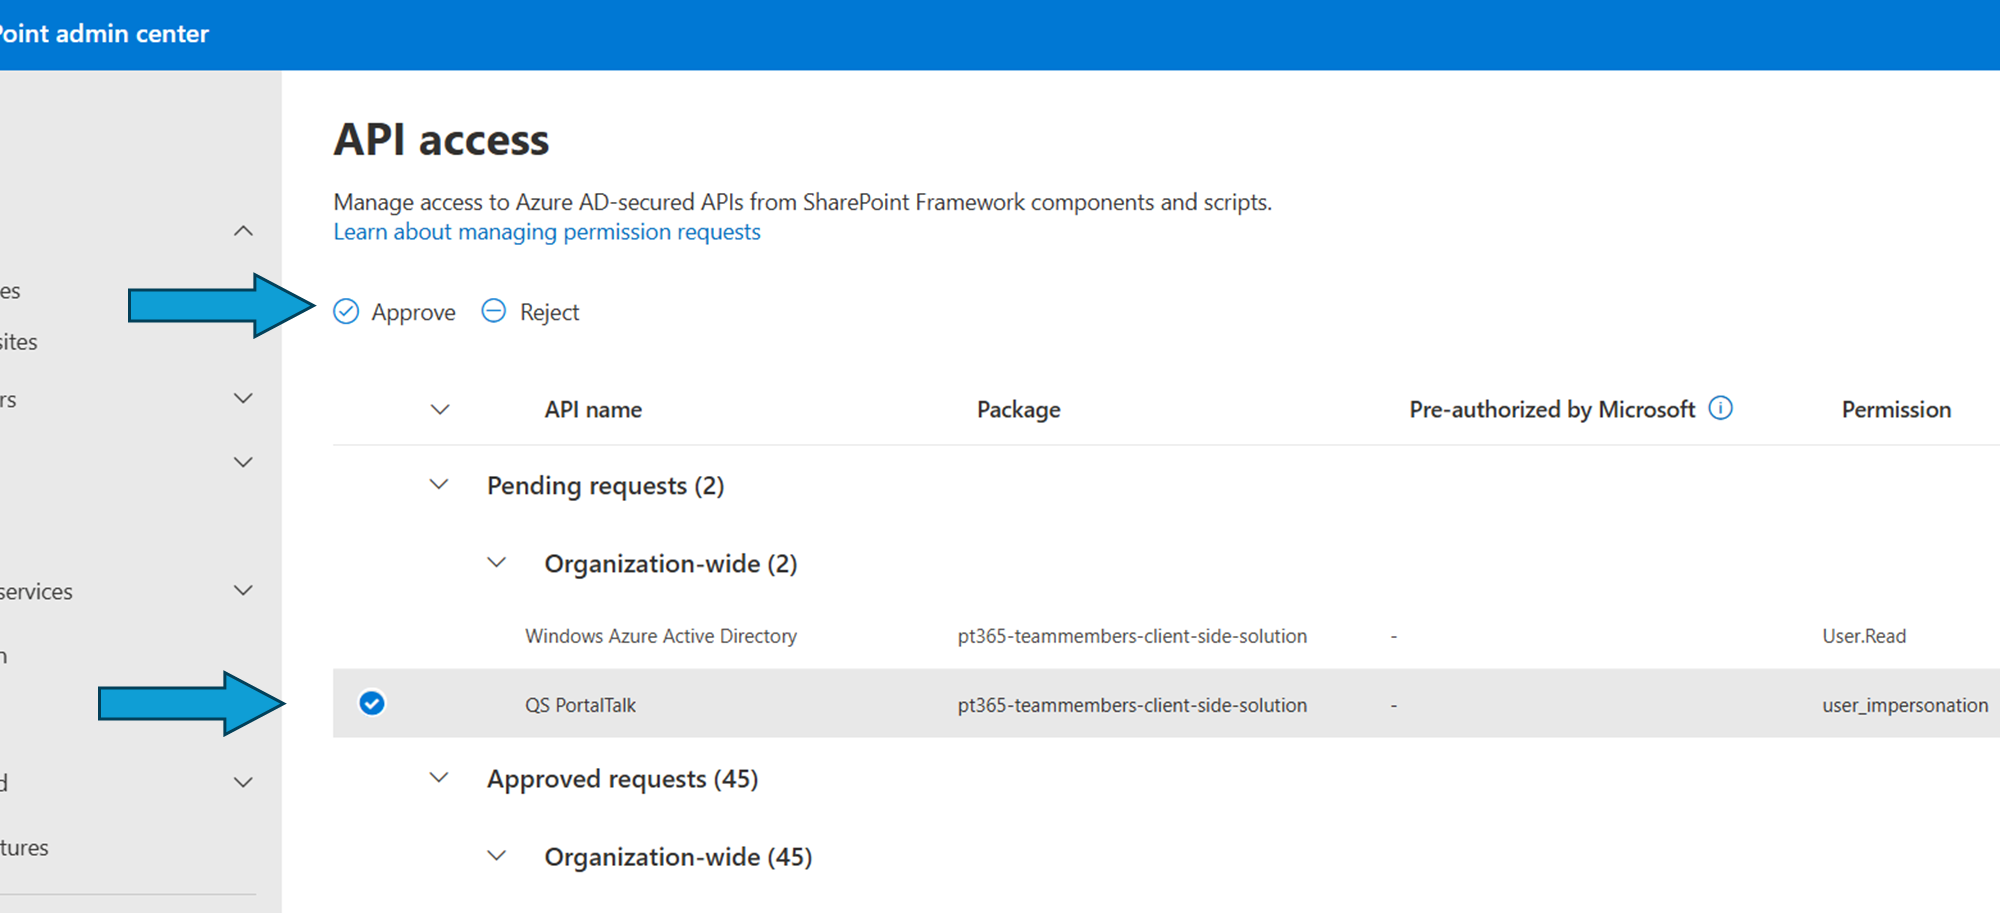
The API Access page will be shown
-
You should see the QS PortalTalk web part at the Pending Requests
-
Approve the API for both web parts.
-
Select the QS PortalTalk line and Choose ‘Approve’
-
It will be approved now and become visible at the ‘Approved requests’
This complets the Install or Update of a PortalTalk web part(s)
Apply the PortalTalk integration web parts
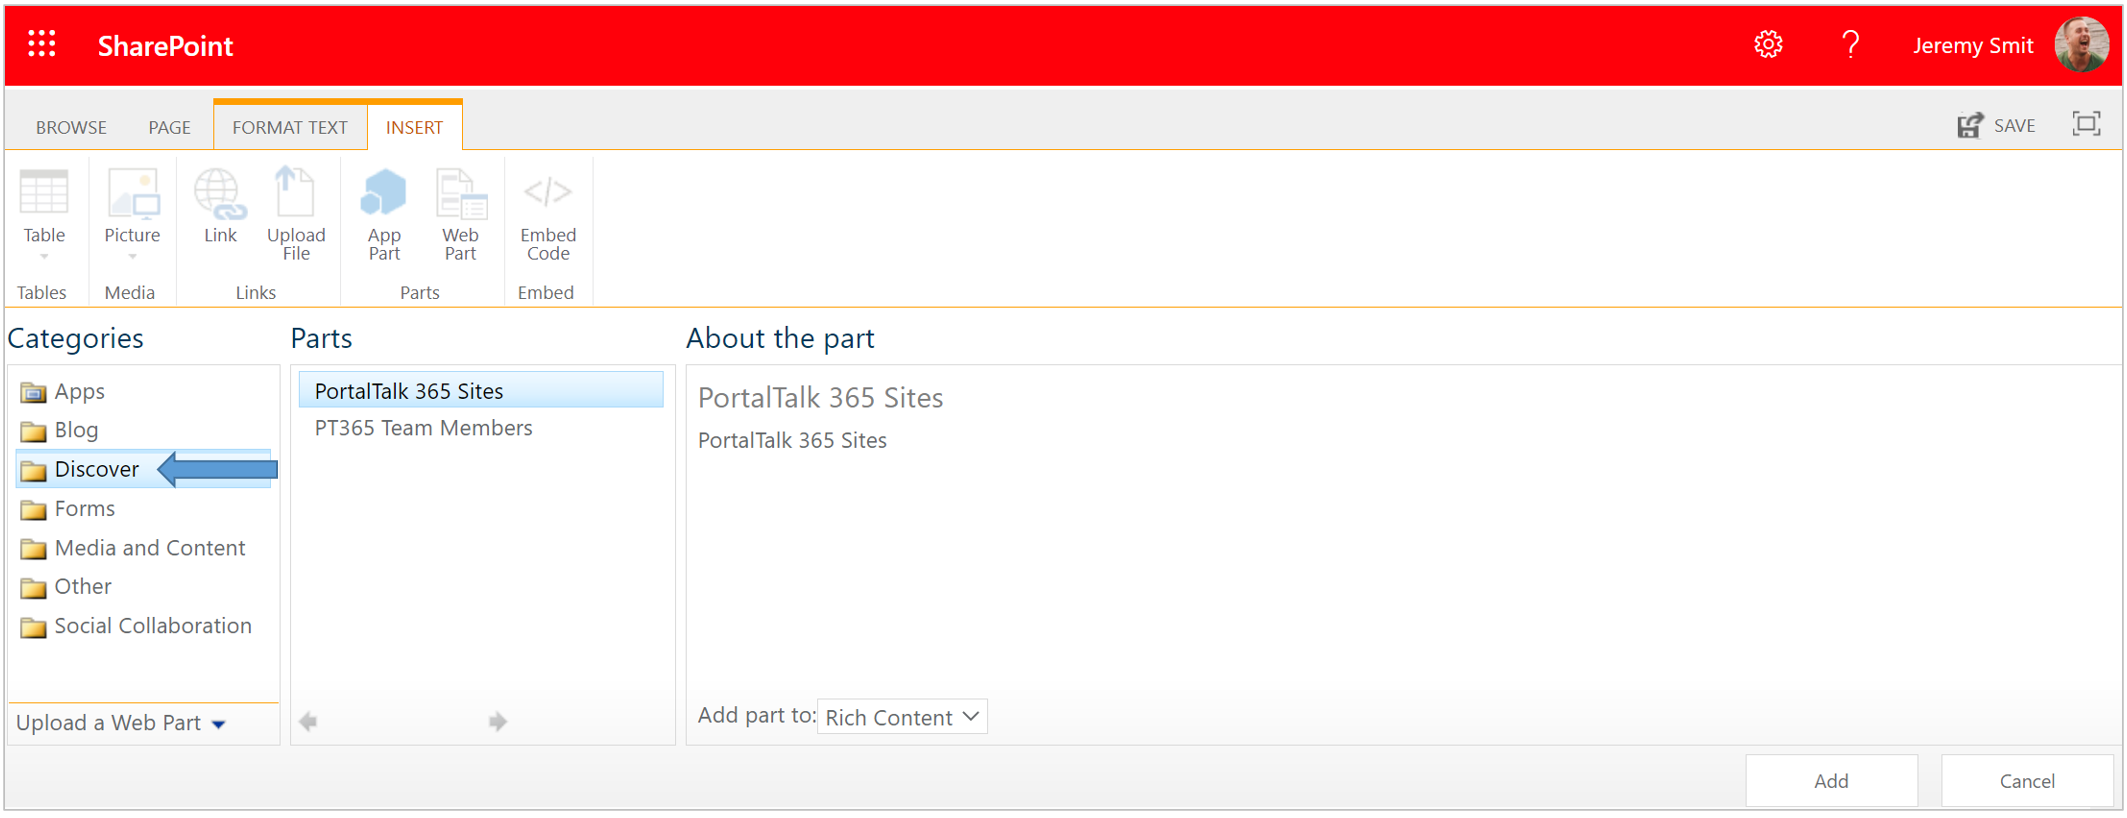
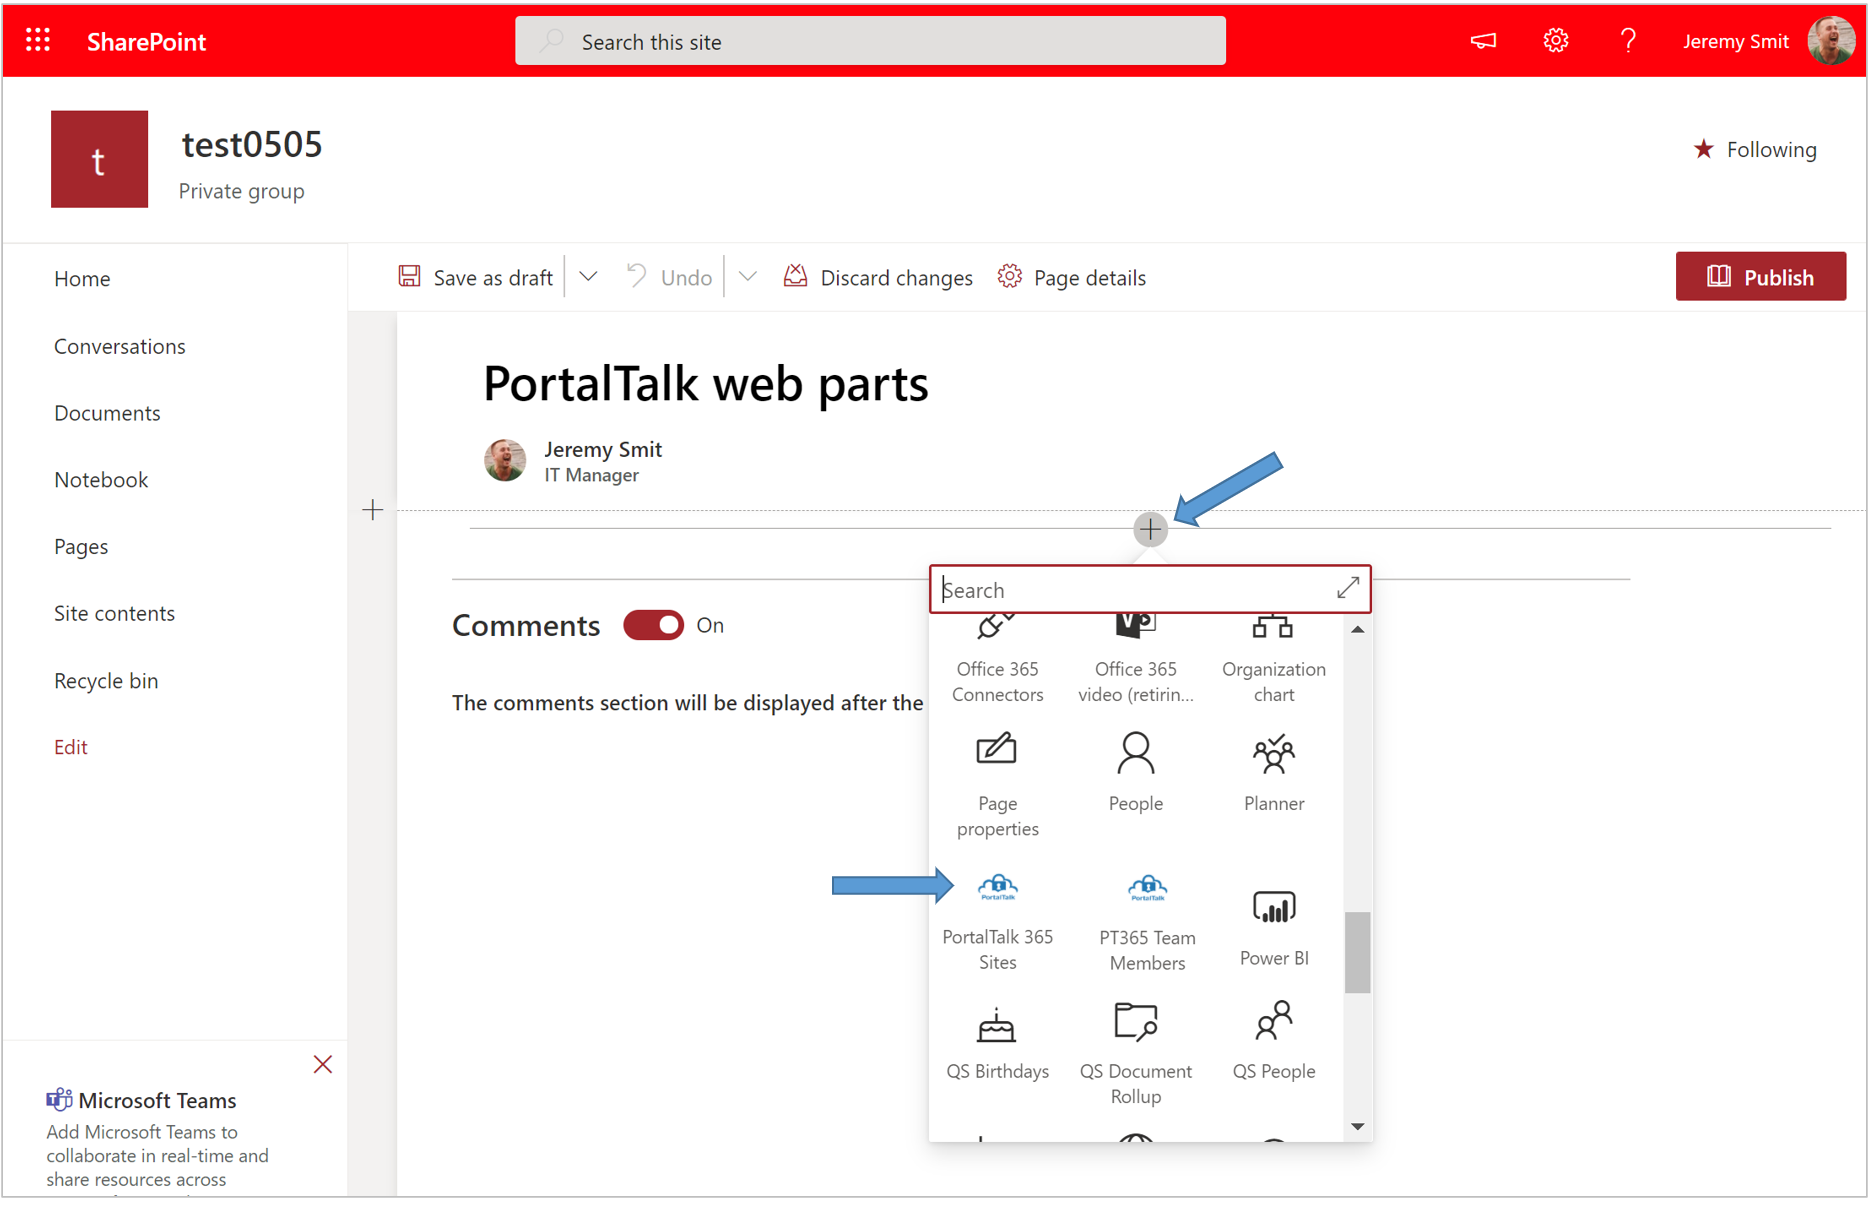
The PortalTalk integration web parts are available within all sites.
They can be found within the Categories list, in the Discover folder.
Post the PortalTalk Team Members web part
-
Add the PT365 Team Members web part to a page within the site whose team members are to be displayed.
-
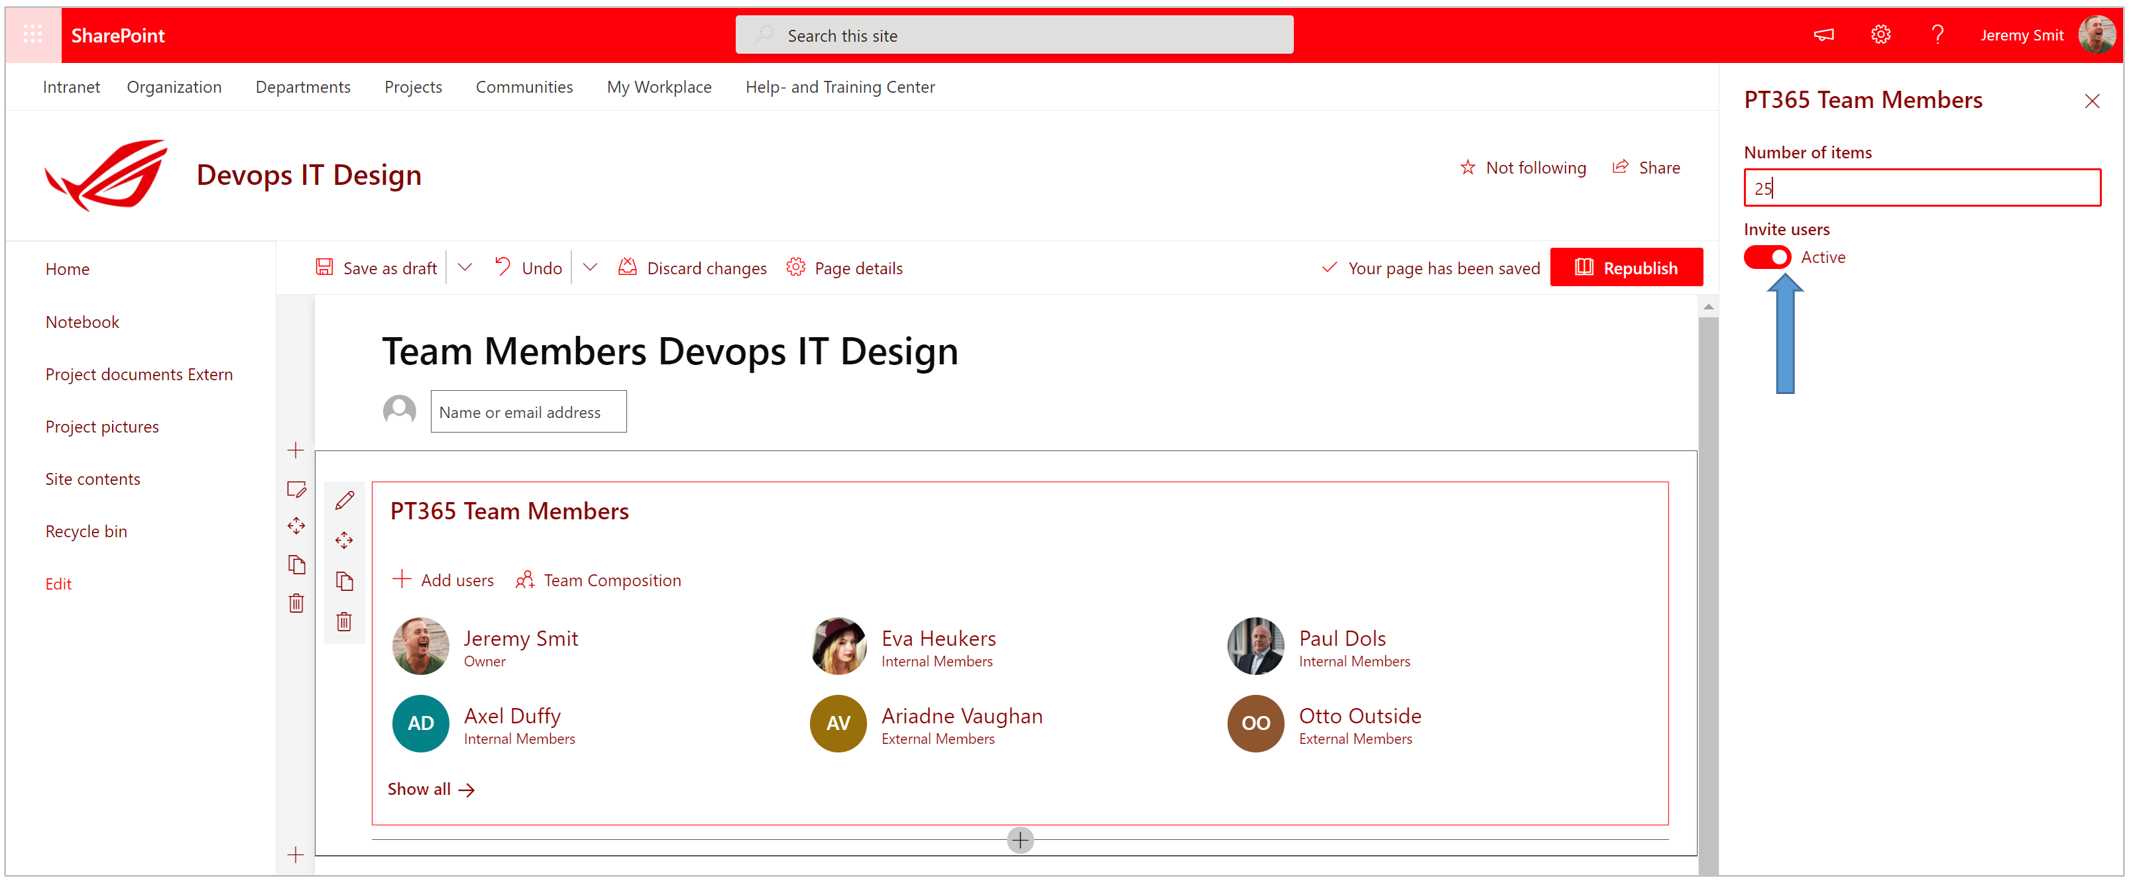
All users added to the workspace's team in PortalTalk are displayed with their role in the PT365 Team Members web part.
The web part setting Invite users determines whether the team management menu options are available to the owners of the respective team.
-
Set the Invite users option to Active and click Apply.
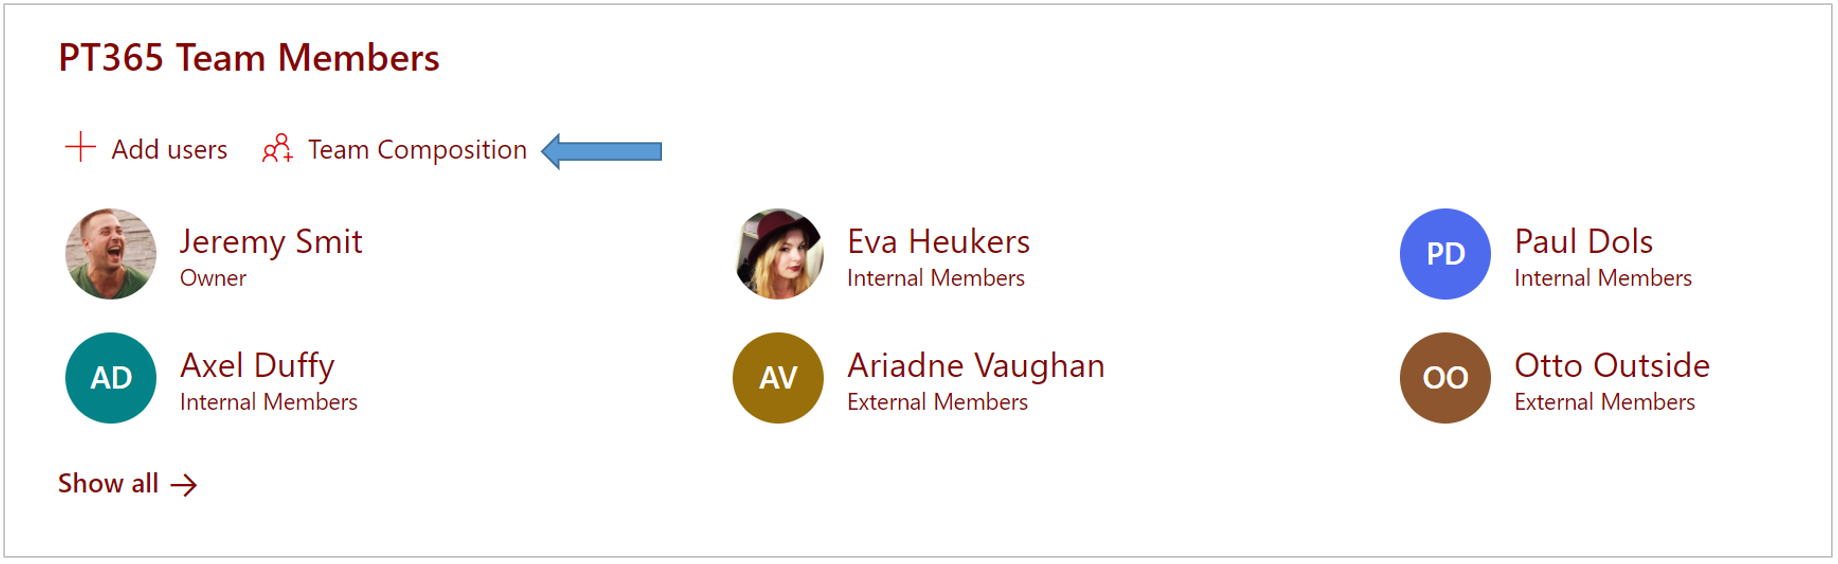
If the web part setting Invite users is set to Active, the team managment options become available to the team owners.
Post the PortalTalk Sites web part
-
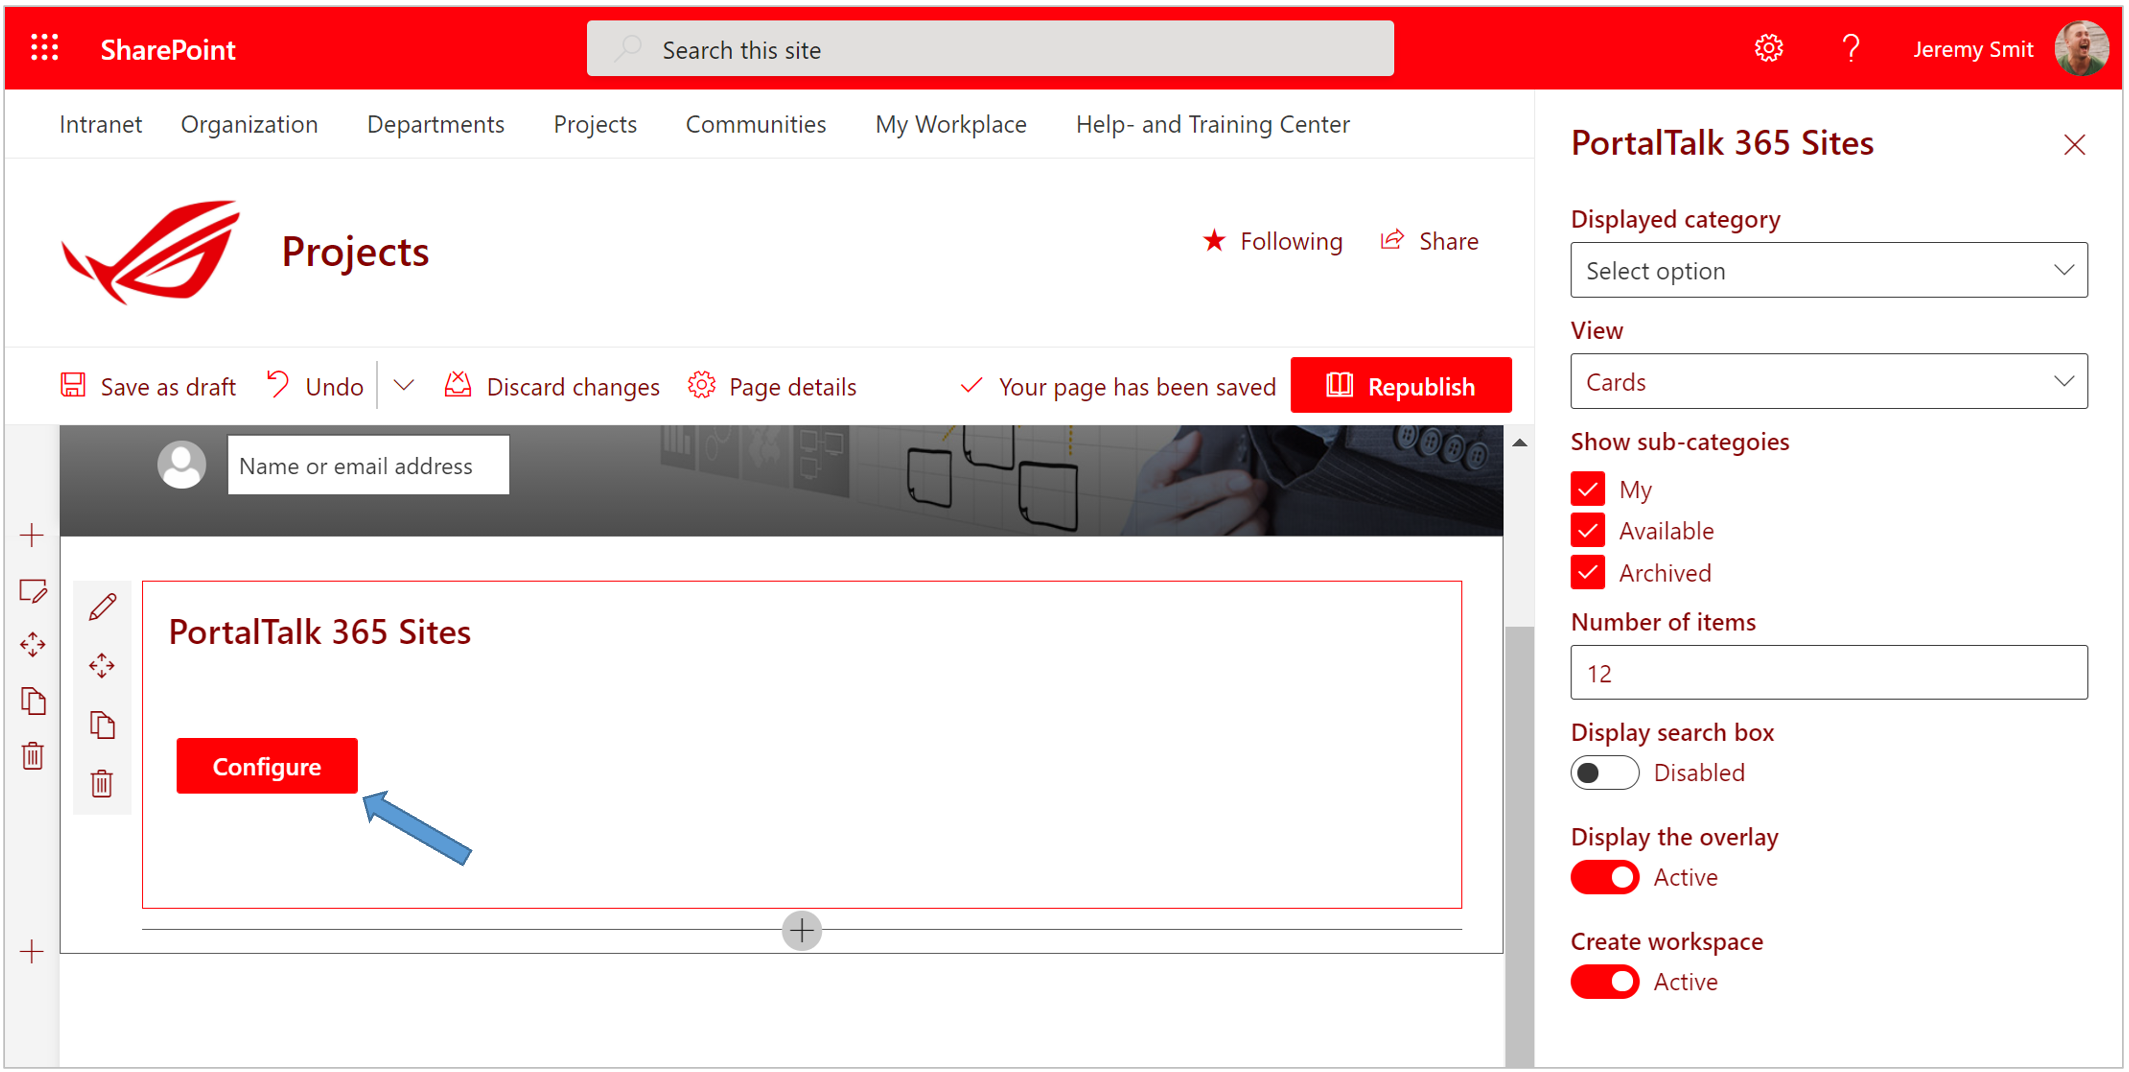
Add the PT365 Sites web part to a page within the relevant SharePoint portal on a user-specific page, for example the My Workplace page.
-
Click Configure. to have the PortalTalk 365 Webpart displayed on the right-hand side of the screen.
-
Displayed categories - Select from which categories the workspaces should be displayed.
-
View - Indicate whether the respective workspaces should be shown in the form of tiles, cards, tiles or as a list.
-
Show sub-categories - Check the subcategories to be displayed (My / Available / Archived).
-
Number of items - Enter the number of tiles or cards to be displayed within the web part.
-
Display Searchbox - Indicate whether a search field should be available.
-
Display the overlay - Indicate whether this option should be activated. This option takes effect only when the workspaces are displayed as tiles.
The overlay is a gray area that lies over the tile and in which the tile information is displayed. The overlay area moves up to display more of the information when the mouse pointer is held over the tile. Below is an example of a Projects web part with overlay and a Communities web part without overlay. -
Create workspace - Set to Active in order to have the Create site and Request site options available to the users with the related permissions.
Example of a PortalTalk Sites web part with cards view:
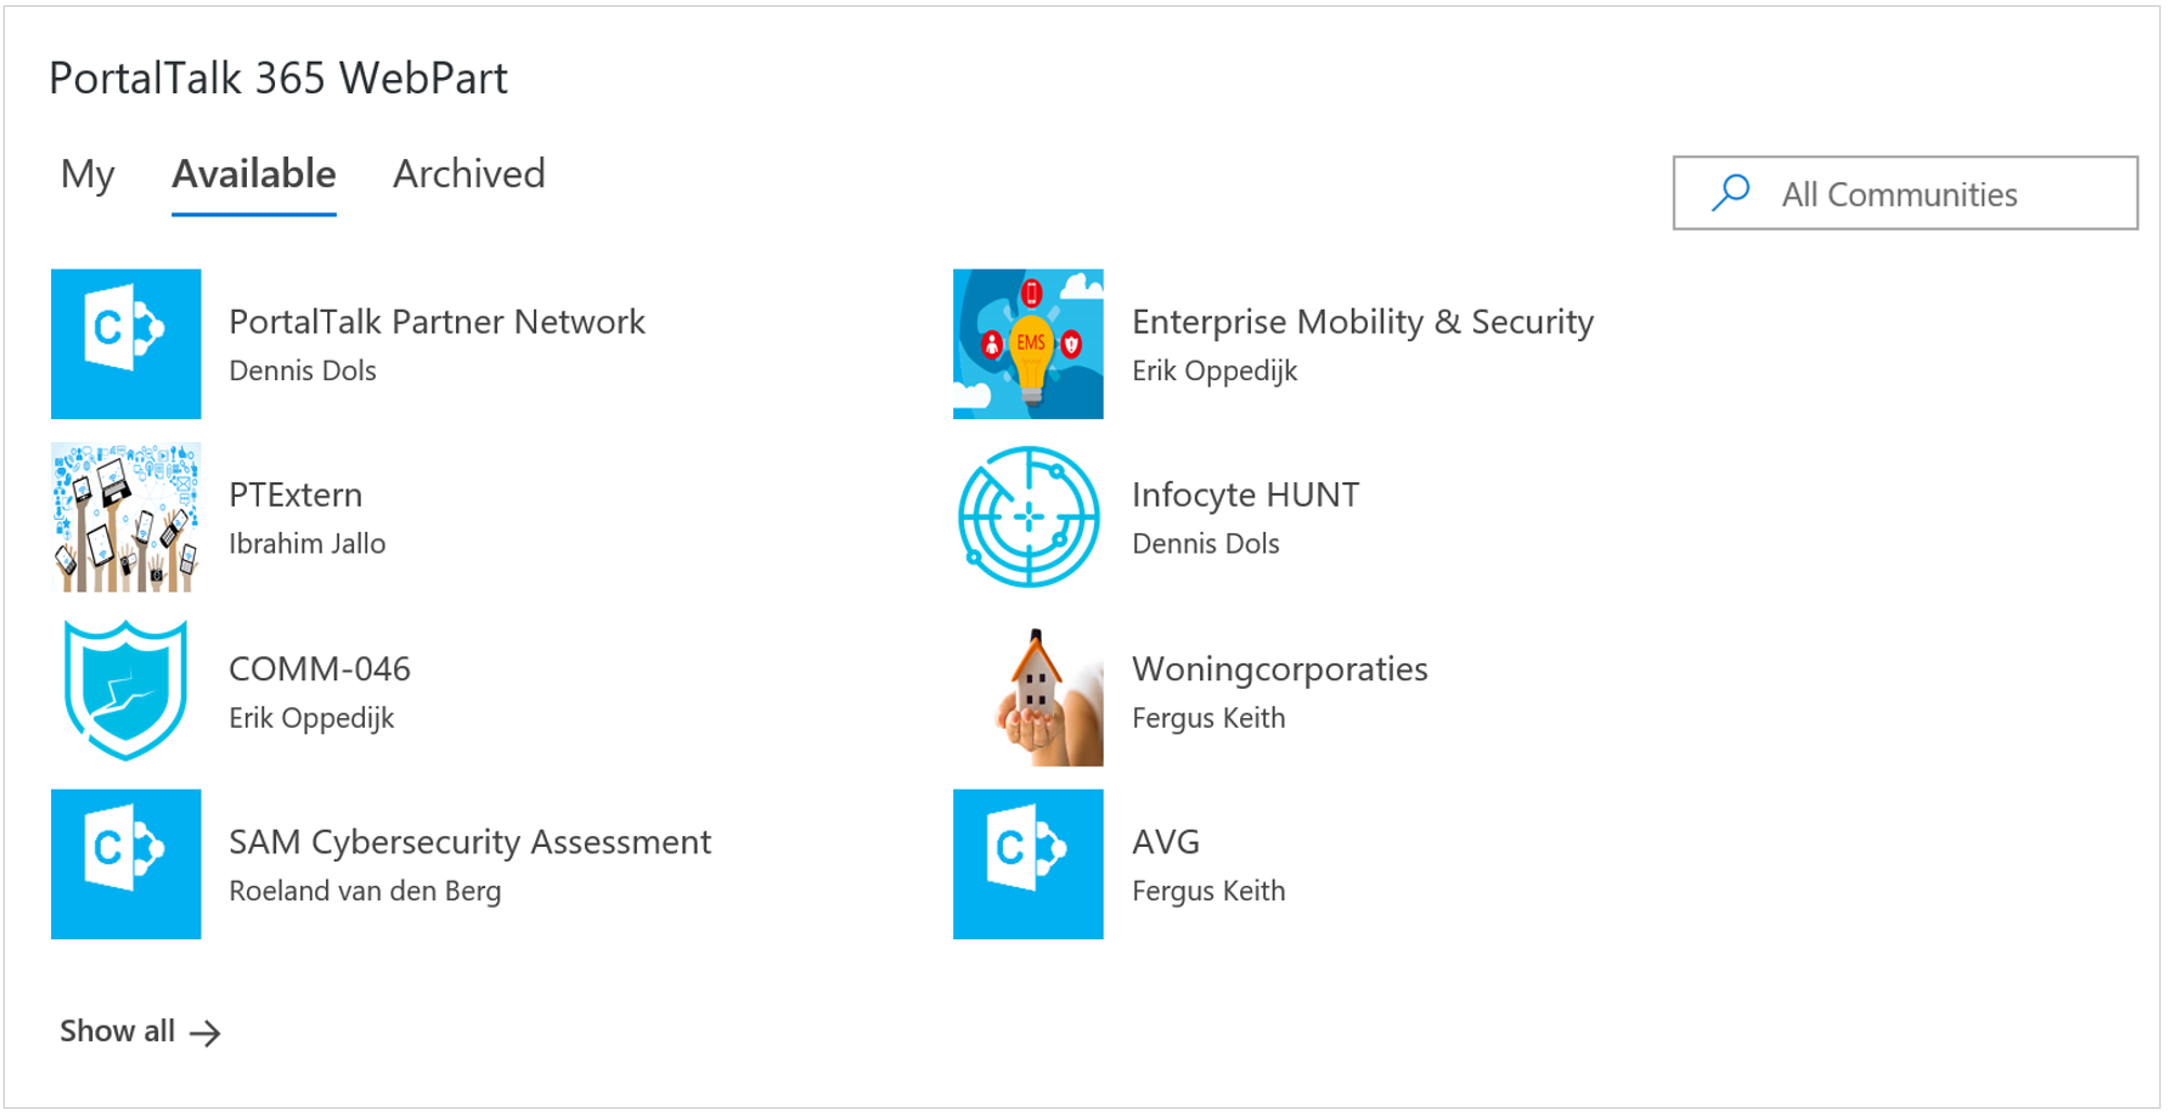
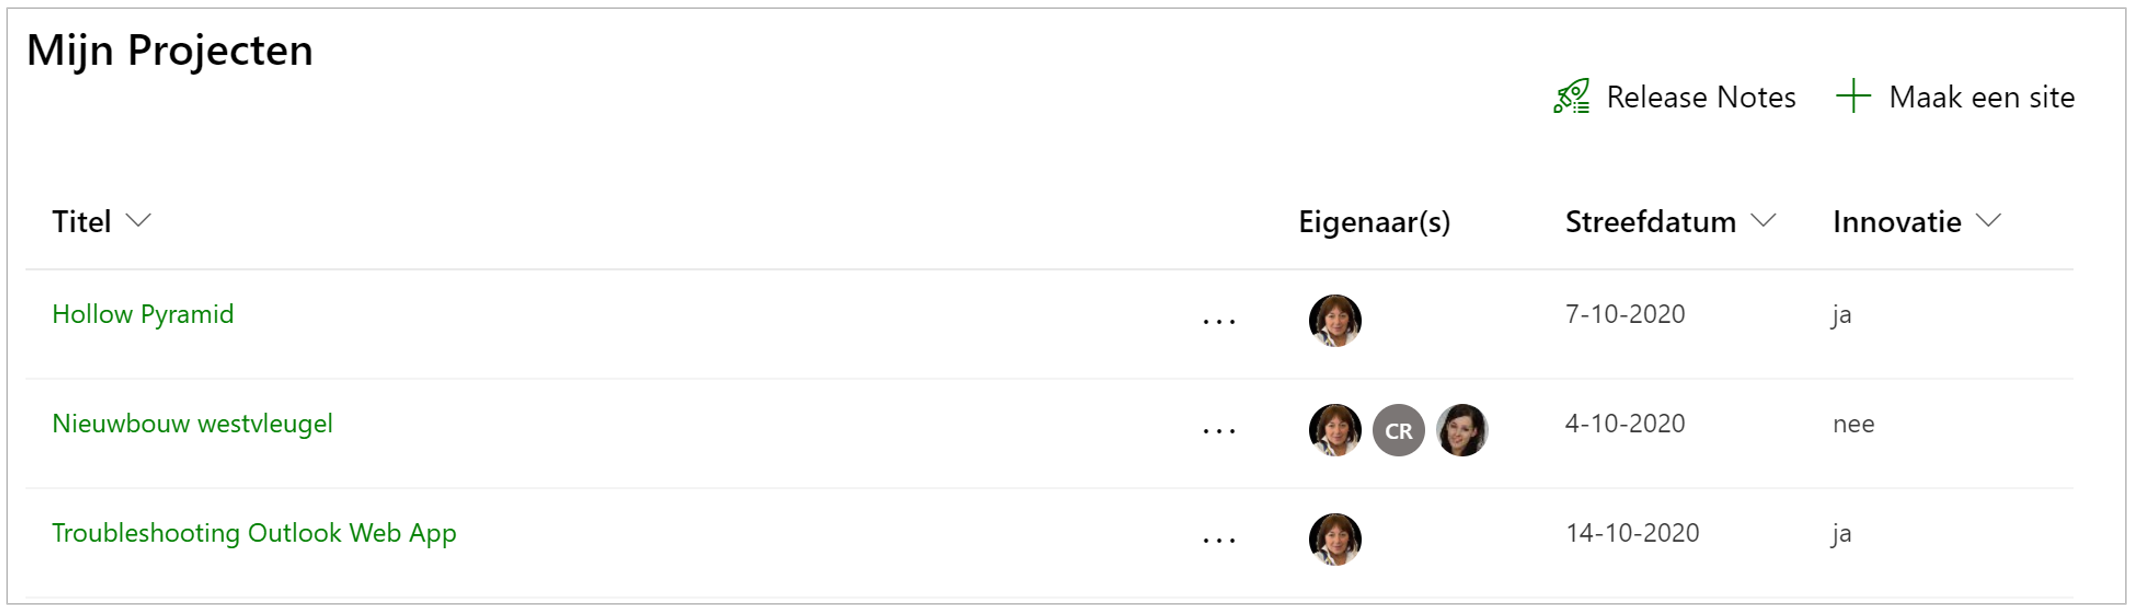
Example of a PortalTalk Sites web part with list view: