.png)
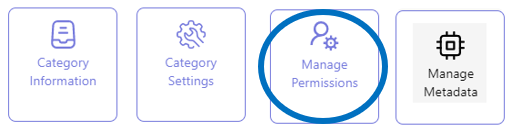
Manage the permissions for a Teamsite (Subsite) workspace category
Teamsite (Subsite) sites can have a variety of custom SharePoint permissions (View Only, Contribute, Edit, Design, Full Control).
These permissions can be packaged into roles which in turn can be granted by a workspace owner to a workspace’s team member.
The roles which can be assigned by a workspace’s owner, are predefined within the concerned workspace category.
Moreover, roles can be assigned by default to the three member types - Internal Members, External Members and Owners.
In the third step of the Teamsite (Subsite) category configuration process, the workspace category’s roles can be configured.
These roles will be automatically configured within each newly created workspace within the workspace category.
If necessary, refer to the page on the PortalTalk workspace categories configuration steps for an explanation of the entire process.
Access the Manage Permissions form
-
Access the PortalTalk Admin Center.
-
Select the Configuration - Categories navigation option to access the Workspace Category list.
-
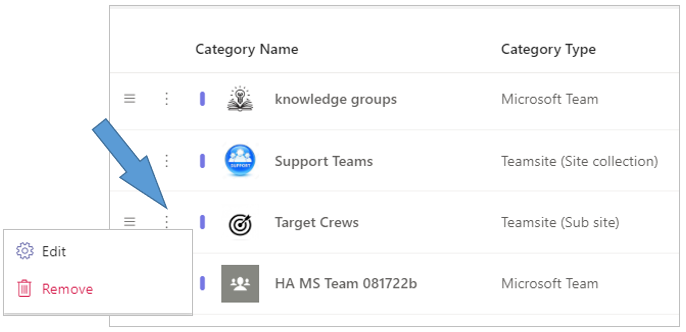
Find the workspace category of type Teamsite (Subsite) for which you need to configure the permission roles.
-
Click the category’s ellipsis menu button and select the Edit option to open the Edit Category form.
-
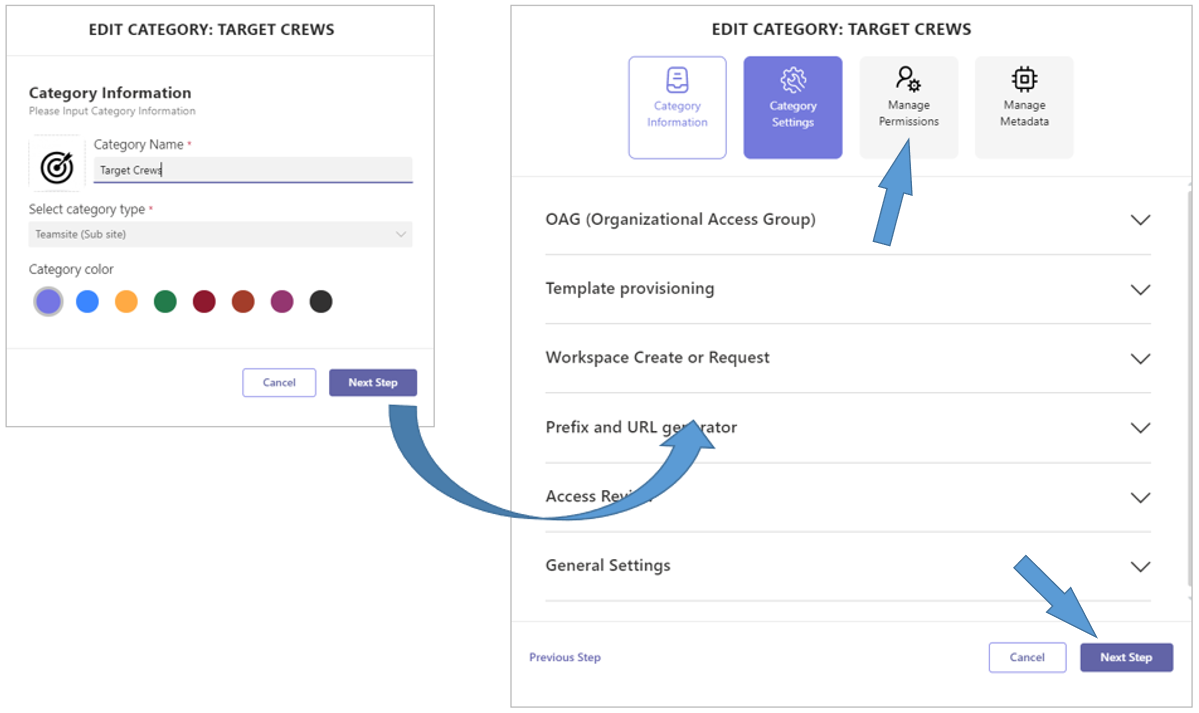
Click the Next Step option to obtain the tabs for the subsequent configuration steps.
-
Click the Manage Permissions tab to open the related form.
-
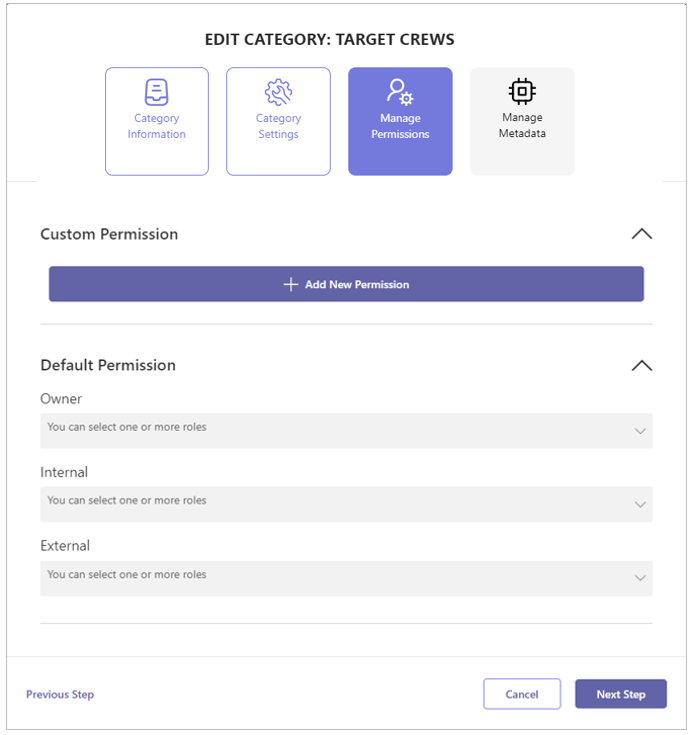
Expand the Custom Permission section and click + Add New Permission.
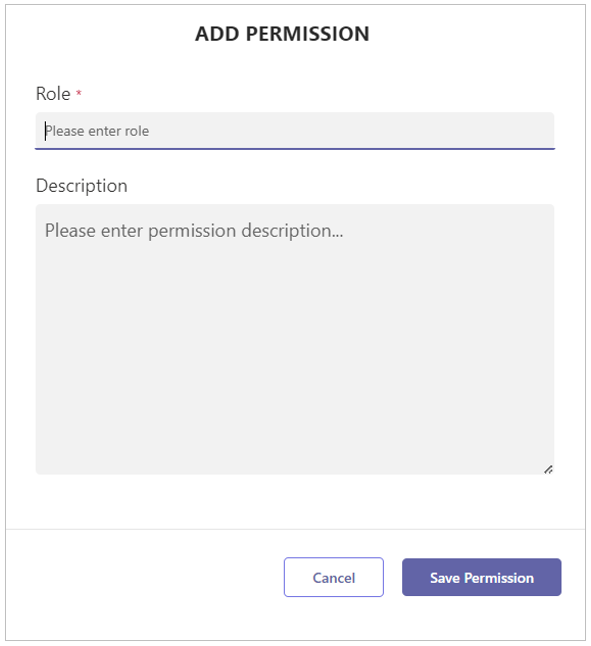
-
Enter the name and description of the new role/permission.
-
Click Save Permission.
Do not use the name ‘Admin’ as role name. This name is reserved by Microsoft. We will show a warning is you are using this name. Please use another permission name
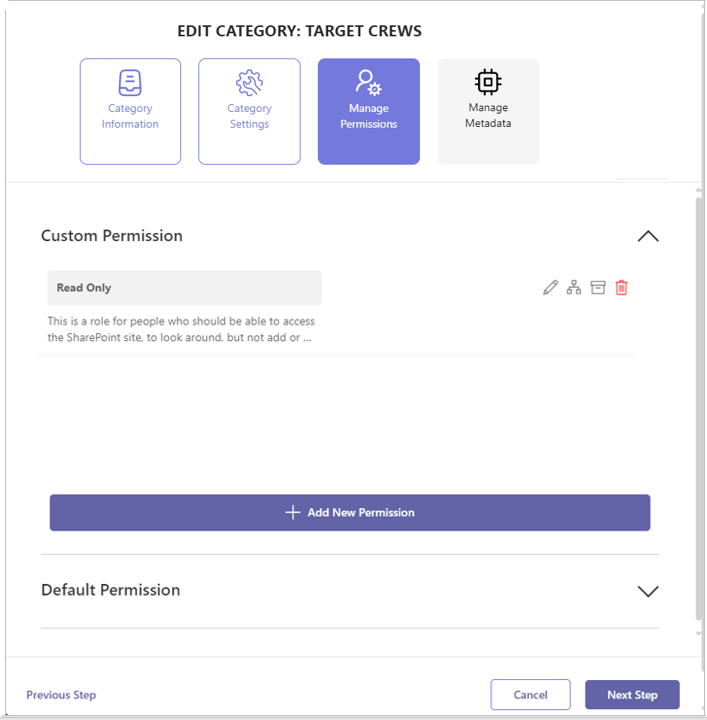
The newly created role is displayed in the list of custom permissions.
-
Create any further roles that are to be applied to the workspaces' SharePoint sites.
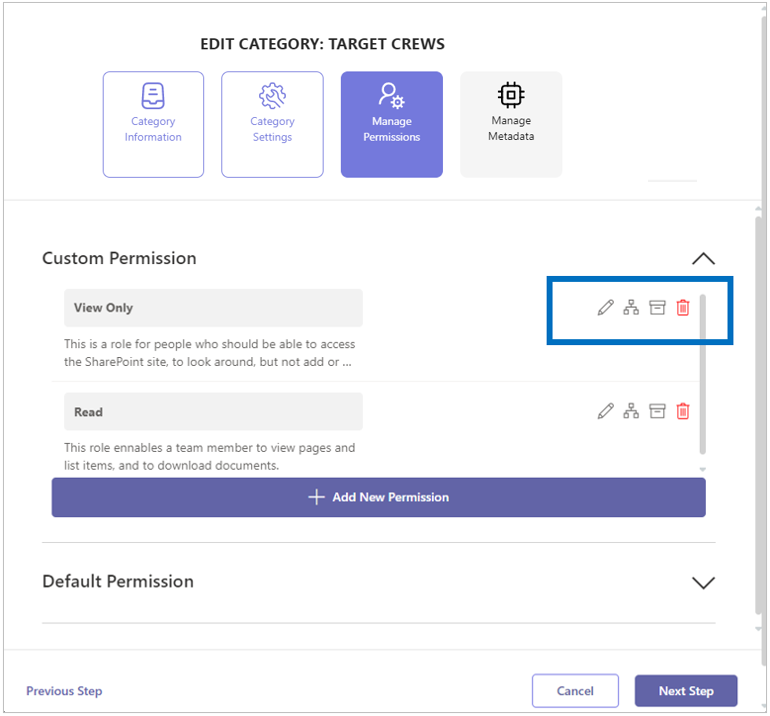
-
Select the organization icon for the role that is to be assigned to the Azure AD group (OAG) with the organization access permission.
-
Select the archive box icon for the role that is to be automatically assigned to all internal team members when the workspace is archived.
All external team members are automatically removed in the workspace archiving process.
-
Expand the Default Permission section.
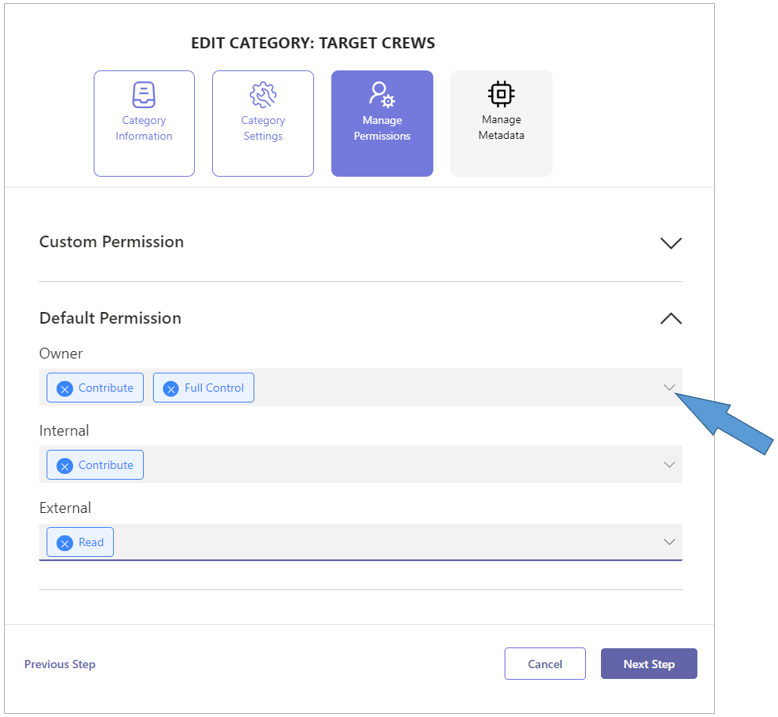
-
Select, per member type, which roles are to be assigned by default to the team members.
-
Click Next Step to save your settings and to move from the Manage Permissions form to the Manage Metadata form.
Continue the final step of the configuration process with the instruction Manage Teamsite (Subsite) Metadata.
Note:
When altering the permission roles in an existing workspace category, newly created workspaces will exhibit the altered permission structure.
This does not apply to existing workspaces.
The PortalTalk API includes a feature that can add new roles to existing workspaces.
This requires additional configuration in creating and running a custom script.
Please contact QS solution's Office Servicedesk to have this arranged.